Install Android on eMMC Orange Pi 5 PRO
If you own an Orange Pi 5 PRO and want to maximize its performance, one of the best solutions is to install the Android operating system directly to the device's built-in eMMC. Compared to running Android from a microSD card, installation on eMMC offers much higher read/write speeds, faster system response, and a more stable user experience overall. This is perfect for users who want to use the Orange Pi 5 PRO as an Android TV box, retro game emulator, media center, or even an Android app development device.
In this article, we will discuss in a complete and structured manner how to install Android on eMMC Orange Pi 5 PRO, starting from the preparation of tools and materials, selection of a compatible Android image, flashing process to eMMC, to additional tips for the system to run optimally. This guide is designed for beginners as well as experienced users who want to get the most performance out of this SBC (Single Board Computer) device. Make sure you follow each step carefully so that the installation process runs smoothly and the device is ready to use without a hitch.
Why Use eMMC to Run Android?
Advantages of eMMC over microSD
eMMC (embedded MultiMediaCard) is an internal storage medium that typically has higher performance and longer lifespan compared to microSD. When Android is run directly from the eMMC on the Orange Pi 5 PRO, boot times are much faster, apps feel more responsive, and the multitasking experience is smoother. This is because the read/write speed of eMMC is more consistent, and it is not easily affected by quality degradation as is often the case with cheap microSDs.
When is the best time to use eMMC
Using eMMC is highly recommended when you want to permanently run Android on your Orange Pi 5 PRO, for example as a Kodi-based media center, retro gaming console, or smart display device. If the Android system only runs from the microSD, it will often feel laggy or slow, especially when opening heavy apps or playing high-resolution videos. By moving to eMMC, performance becomes more reliable for long-term use.
Preparation Before Installation
Before starting the Android to eMMC installation process on the Orange Pi 5 PRO, there are some important things you need to prepare first. Careful preparation will make the process run smoothly without a hitch. Starting from supporting hardware, the right Android image, to the software needed for the flashing process.
Required Devices and Materials
To get started, make sure you have the following devices:
- Orange Pi 5 PRO complete with eMMC module.
- Keyboard and mouse (if using the Android desktop interface).
- HDMI cable along with the monitor or TV used to display the Orange Pi.
- A stable power adapter (at least 5V 3A).
Also, prepare an internet connection if you want to download additional files during the process.
Choosing a Compatible Android Version
There are several Android variants available for the Orange Pi 5 PRO, including Android TV and standard Android (tablet mode) versions. Choose the Android image that best suits your needs. For example, if you want to create a media center for your living room, the Android TV version is the best choice. Also, make sure that the image is compatible with the Rockchip RK3588S SoC used in the Orange Pi 5 PRO. You can look for it on the official Orange Pi forum, GitHub, or communities like Armbian and XDA Developers.
Supporting Software (Flashing Tool, Driver, etc.)
To flash Android to the microSD card, you need software such as:
- RKDevTool or AndroidTool (optional) - if you want to flash directly to eMMC via USB Male to Male cable (need maskrom mode).
- Rockchip USB Driver - if you want to connect Orange Pi to PC for direct flashing.
You can get the above software on their official website. make sure all software is downloaded and installed correctly before entering the next installation stage.
Steps to Install Android to eMMC Orange Pi 5 PRO
If all the preparations above have been made, it means that you are ready to install Android to eMMC Orange Pi 5 Pro.
Download the Appropriate Android Image
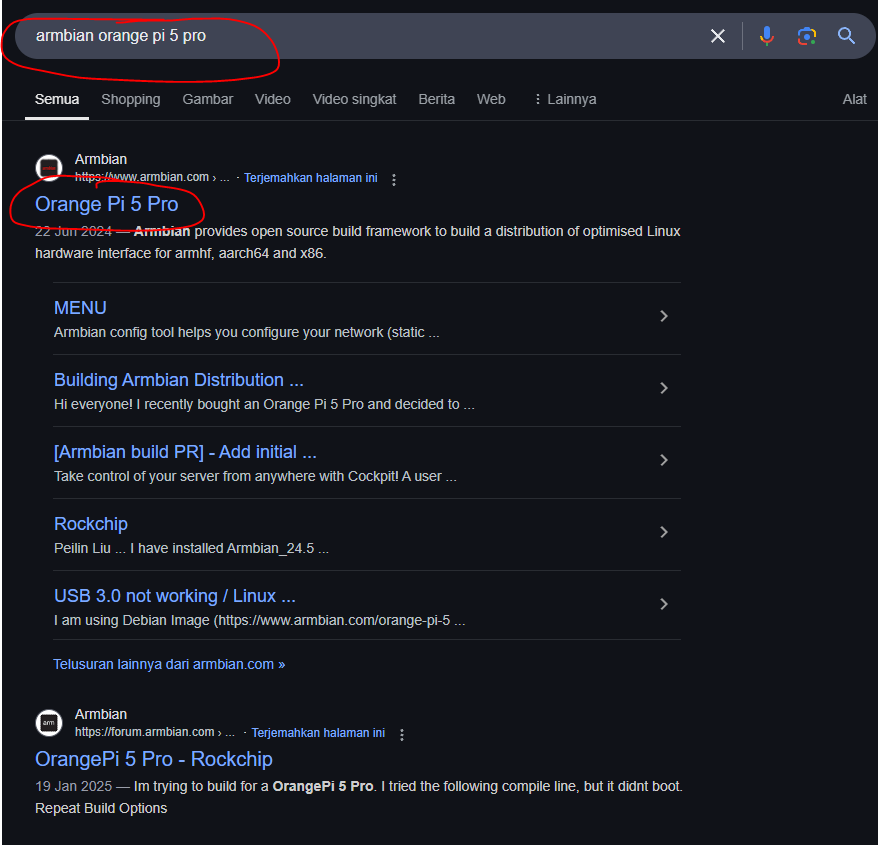
- Visit the official website of Orange Pi, type “Orange Pi 5 Pro” in the search, then select their official website which is orangepi.org, click the first one
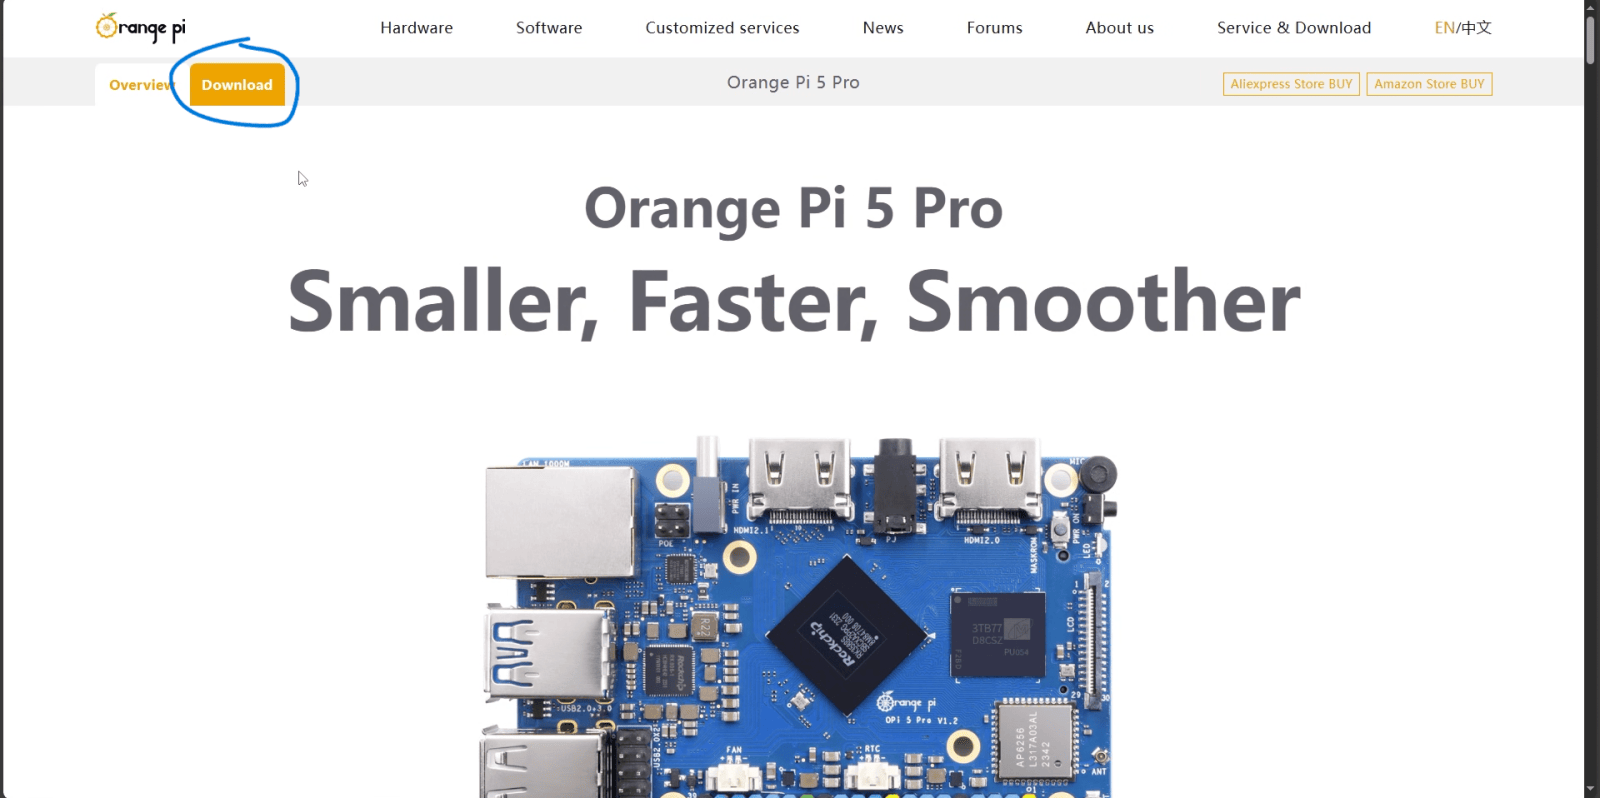
- Once on the main page, go to the bottom of the navbar and select download.
- Scroll to the very bottom, here there are many choices of operating systems, but in this tutorial we download “Android”, click download at the bottom of android

- If so, you will be redirected to the Google Drive page, select “TF Card and eMMC boot image”

- There are several choices here, if there is the word “box” here, it means that the ui is similar to Android TV, for this “lcd” I don't know, here I choose Android 12. ISO this looks similar to a tablet

Download Flashing Tools dan Rockchip Drivers (If not yet available)
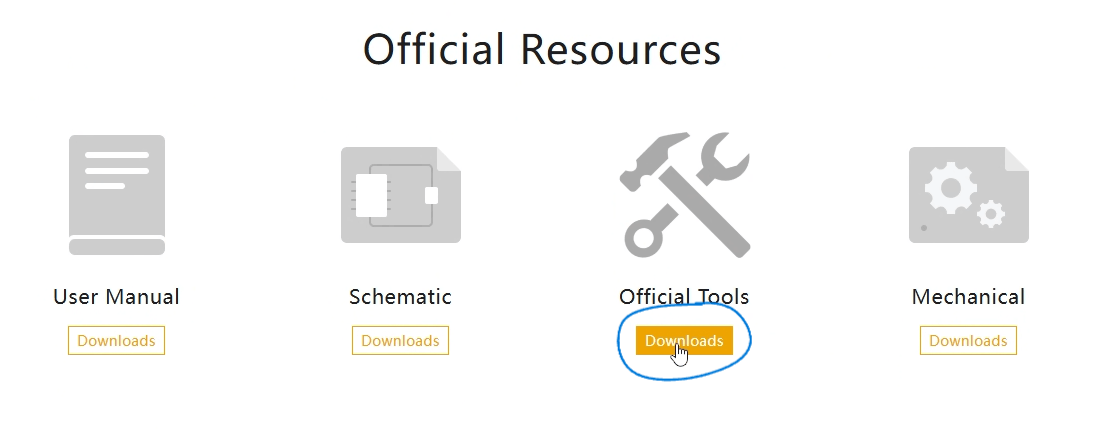
- Follow the previous tutorial in numbers 1-3, the difference is that we go to official resources, click Download on official tools
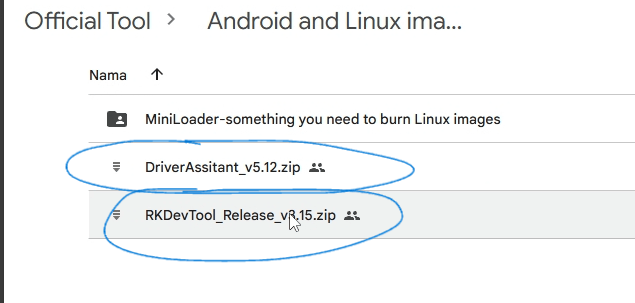
- Choose “Android and Linux image burning tools-RKDevTool and Driver”
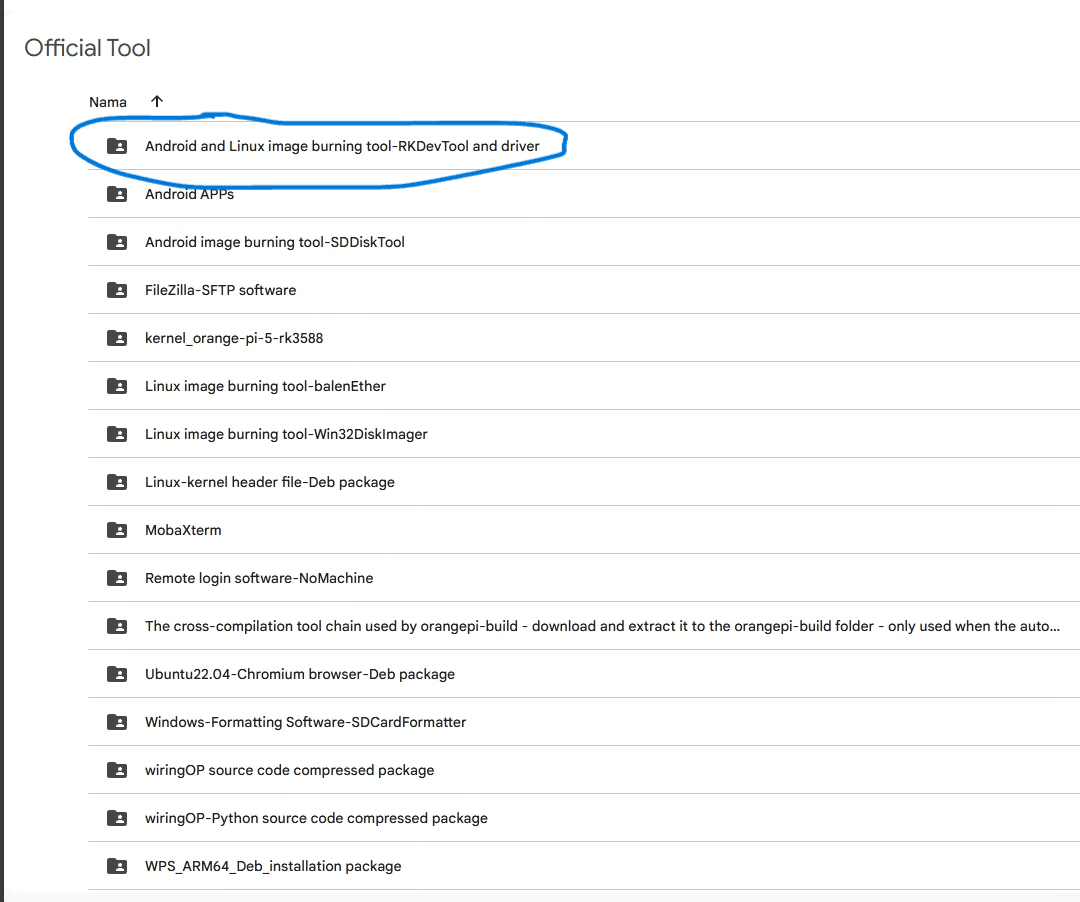
- Then download “DriverAssistant” and “RKDevTool”
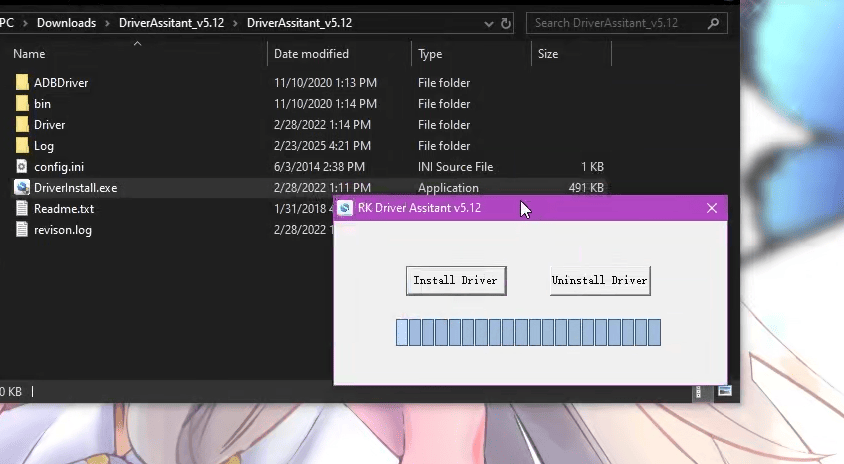
- If you have finished downloading, extract and then install the two applications
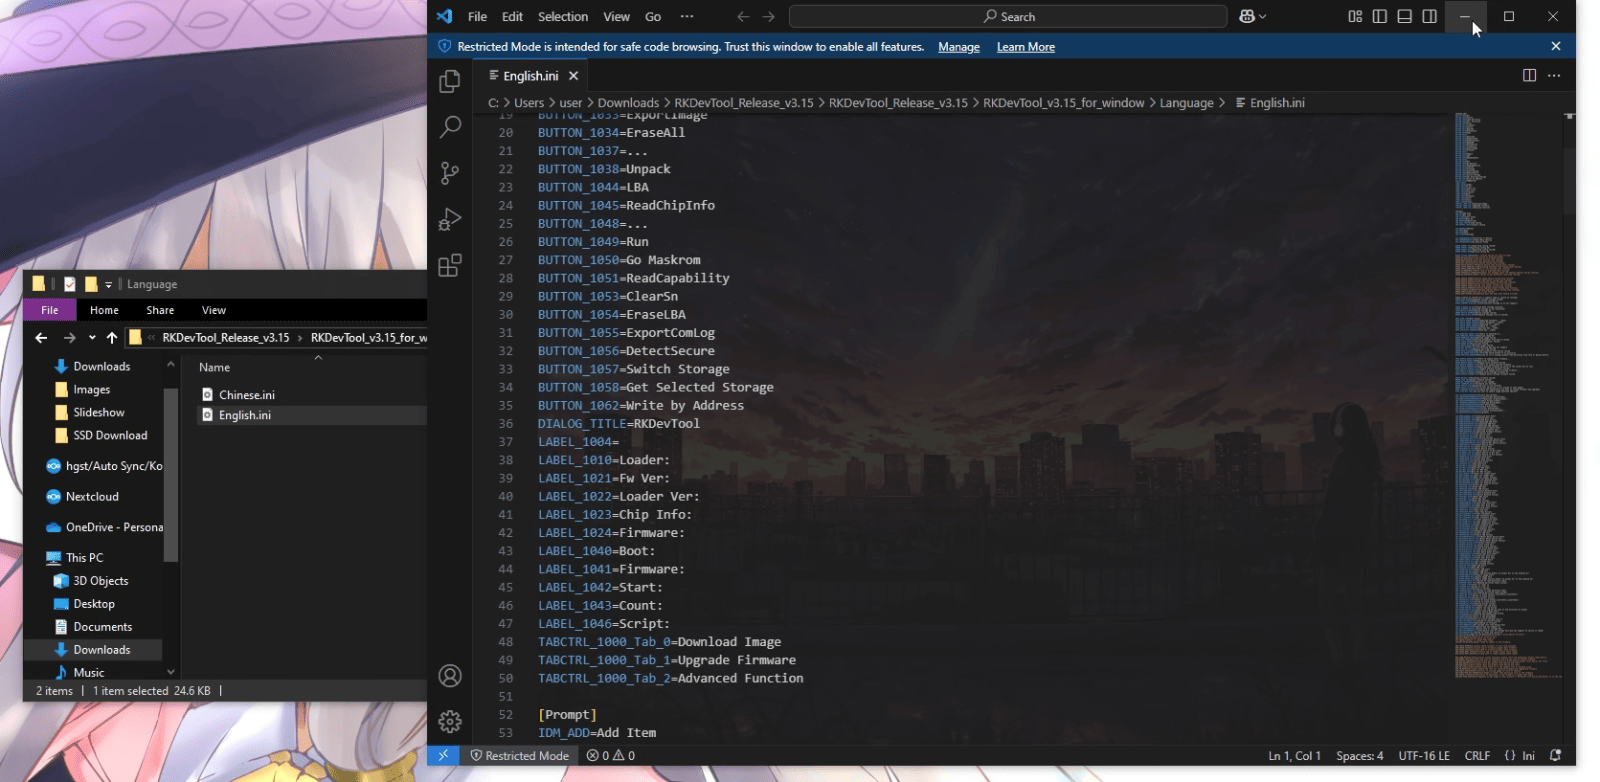
- In RKDevTool go to the Language folder, then open the contents of “English.ini”, copy the contents of the file then open “Chinese.ini” then replace all the contents of the file with CTRL + A + DELETE / Backspace then paste the text that was copied earlier
Flash Android Image to eMMC
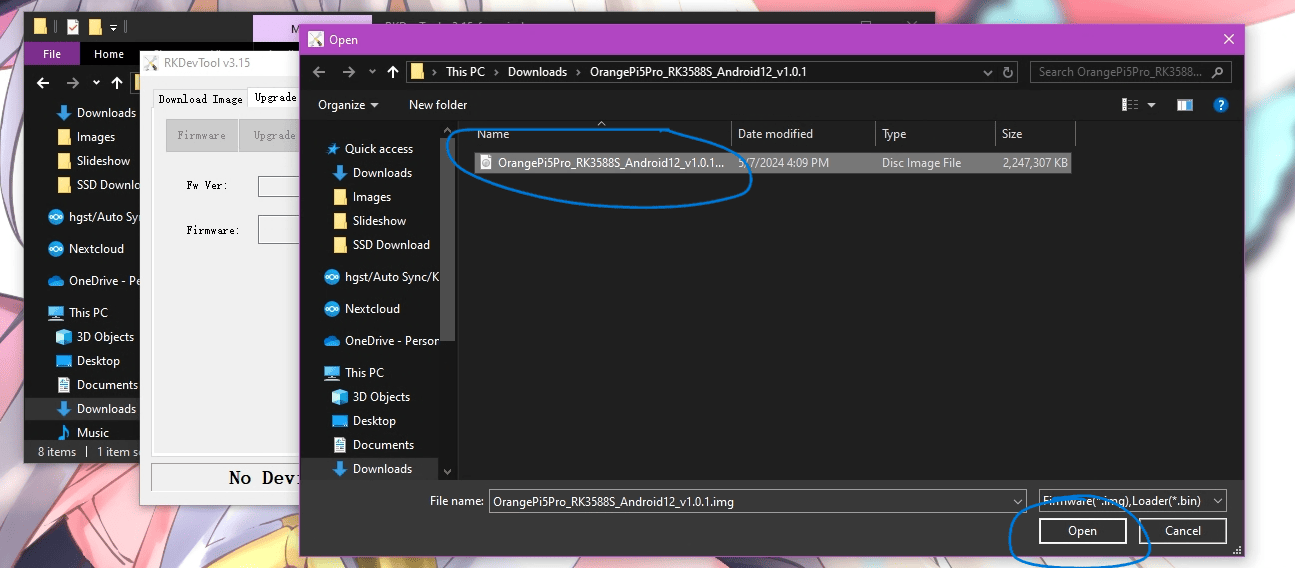
- Open the “RKDevTool” application then go to “Firmware Upgrade” then click “Firmware”
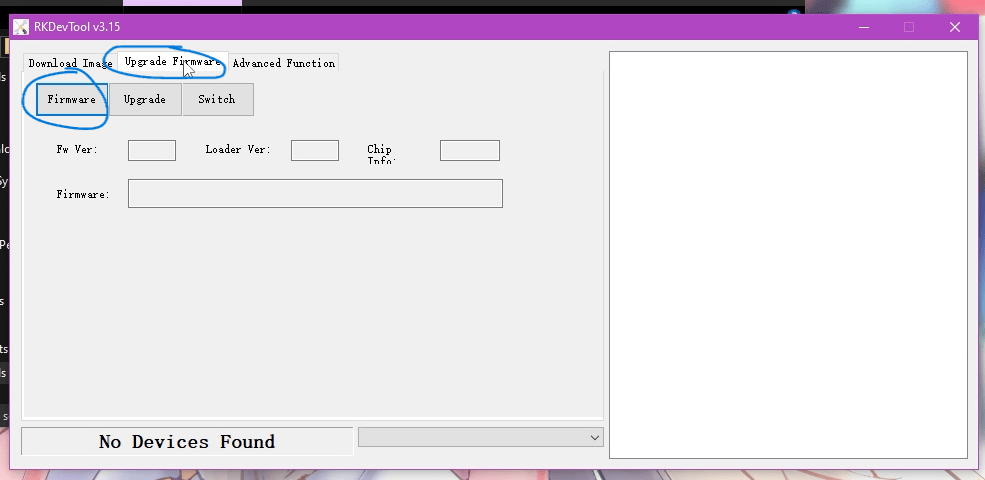
- Choose where the Android ISO file is located
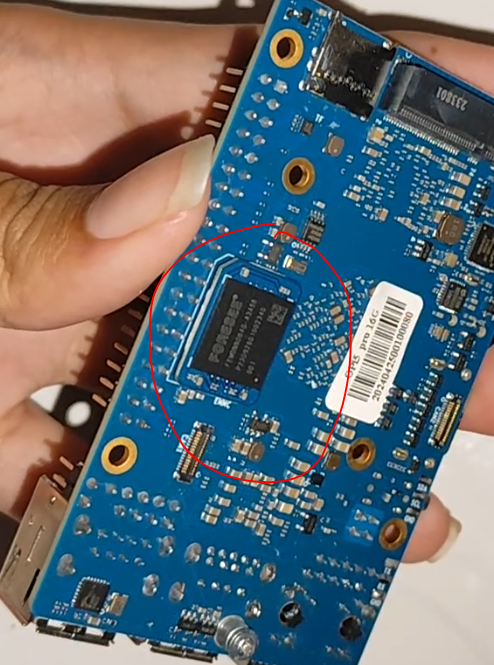
- We move on to the Orange Pi 5 Pro, please install the eMMC on the eMMC port at the bottom of the board next to the NVMe slot.
- If so, go through these steps, please be careful in this section
- Plug HDMI into the Monitor
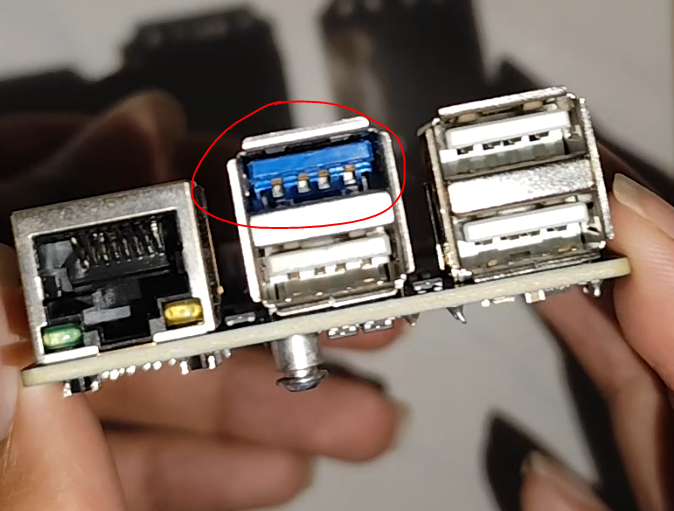
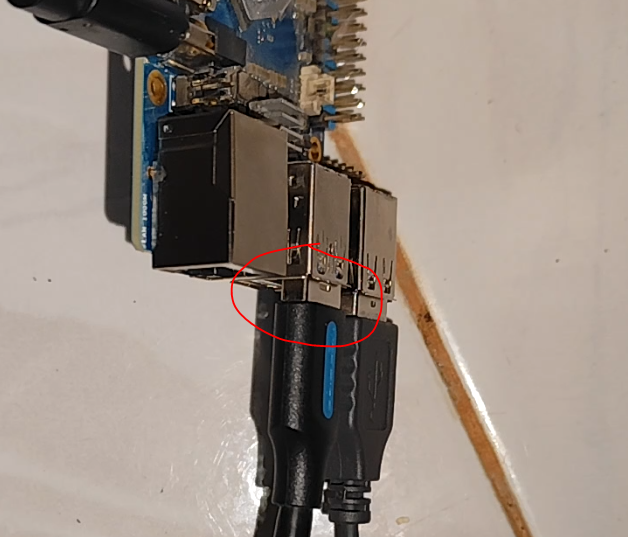
- USB Male to Male to USB 3.0 (blue color) on the Orange Pi 5 Pro and the other to the computer.
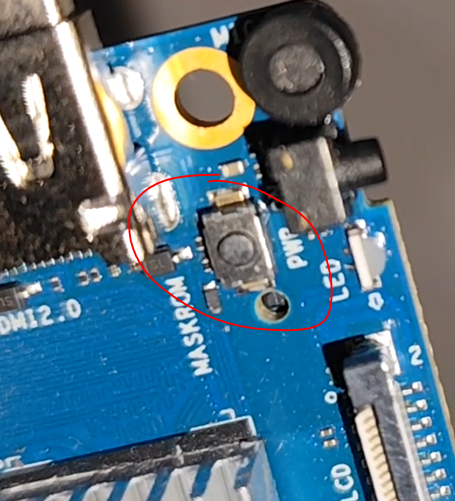
- hold down the “maskrom” button near the HDMI and mic, then insert the Type C power supply
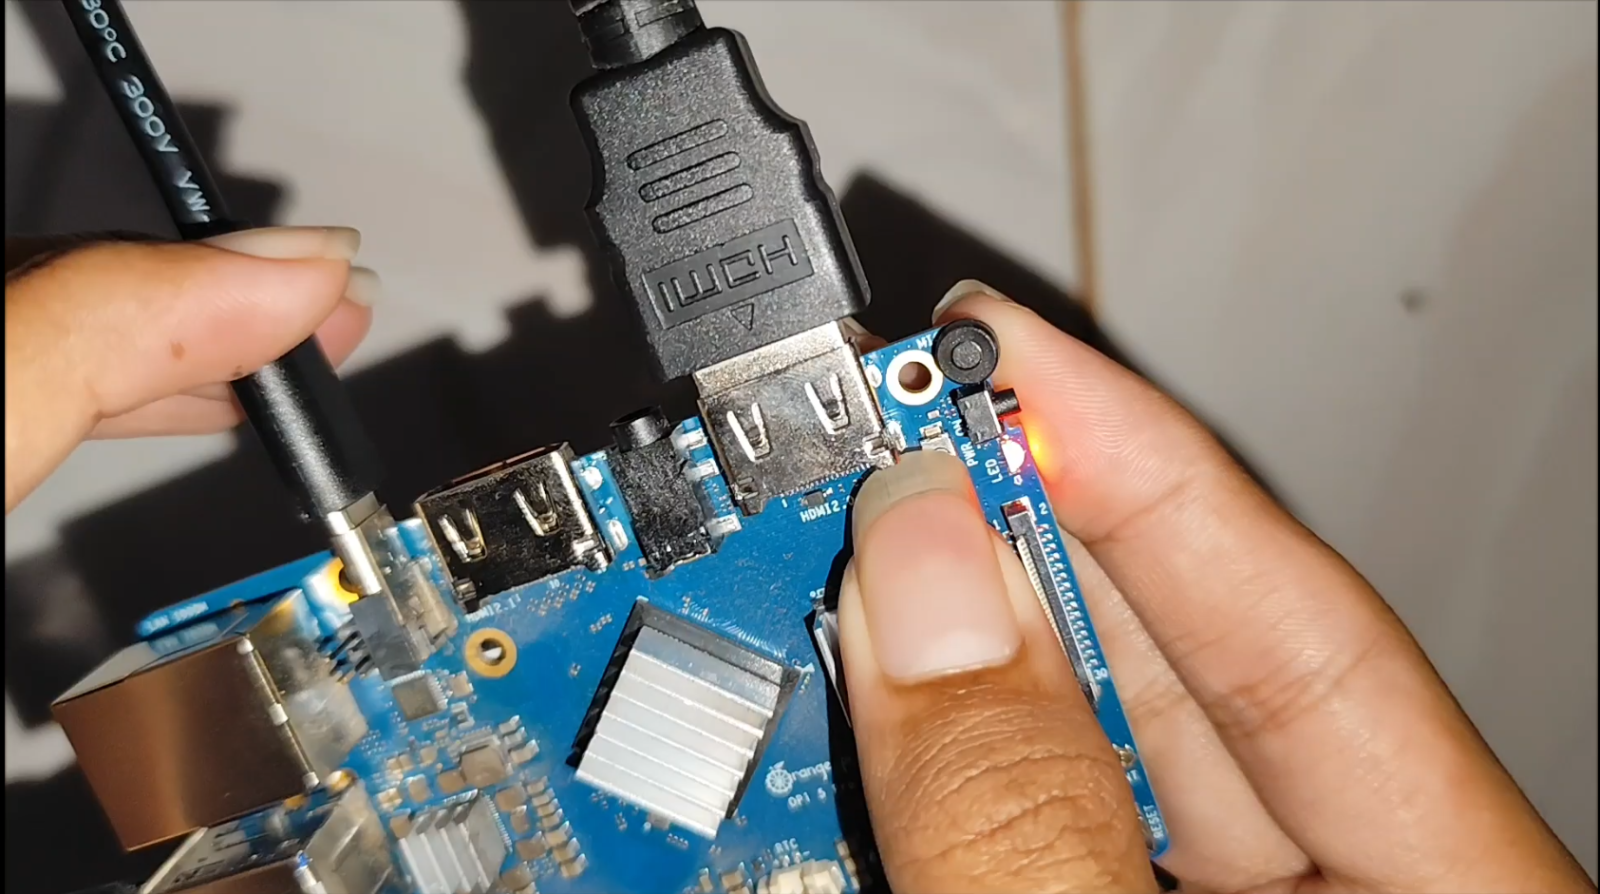
- If the indicator is already blinking and there is input sound into the computer release the “Maskrom” button
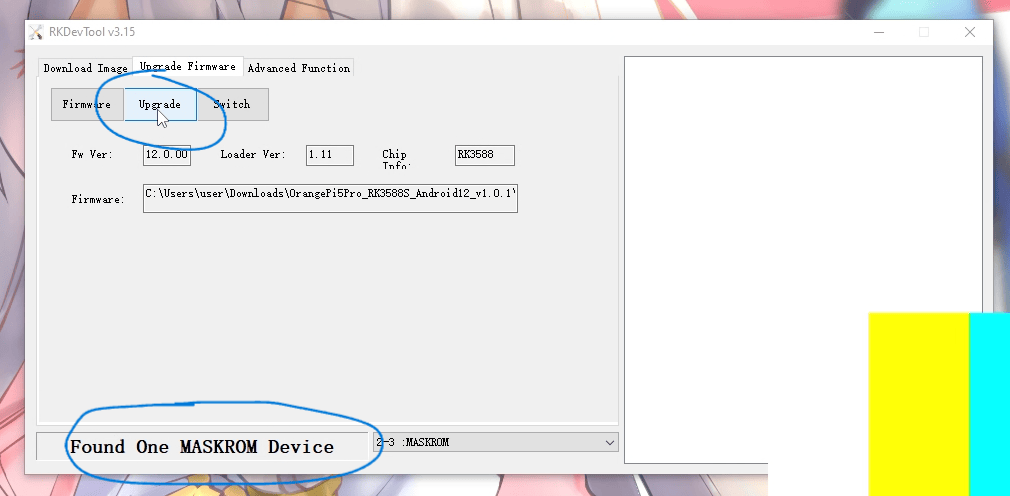
- if successful it will appear “Found One MASKROM Device”, if it has been detected please click “Upgrade”
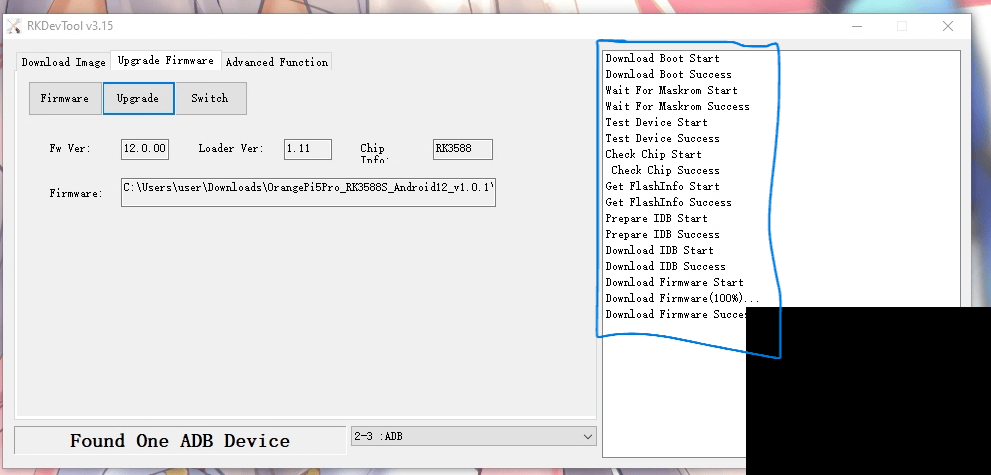
- the progress will appear on the right side of the application
Boot Orange Pi 5 PRO from eMMC
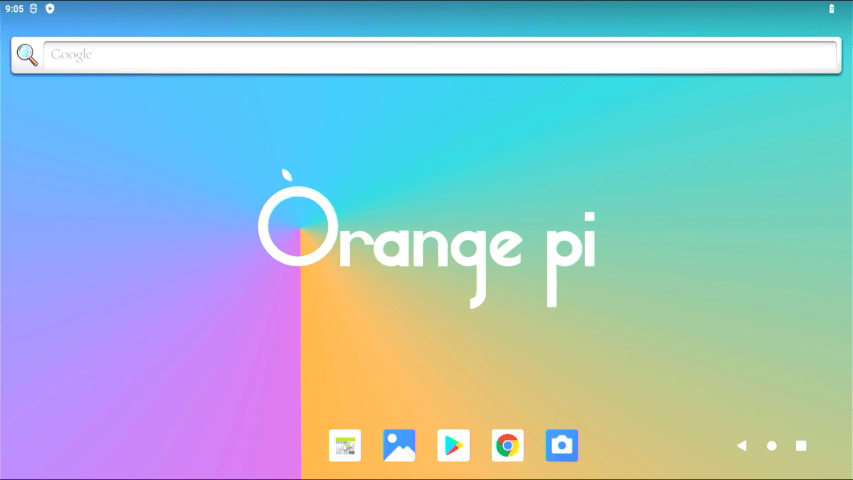
- Next, you just wait and Orange Pi 5 Pro will enter the Android 12 operating system and run on eMMC.
Conclusion and Closing
Installing Android on the eMMC on the Orange Pi 5 Pro provides a much faster and responsive experience compared to running it from the microSD card. By following the steps that have been explained, your device is now ready to be used for various needs, ranging from media center, game emulation, to direct Android application development. Hopefully, this guide will help you maximize the potential of the Orange Pi 5 Pro. If you experience any problems during the installation process, don't hesitate to leave a comment or ask questions through the community forum. Good luck!