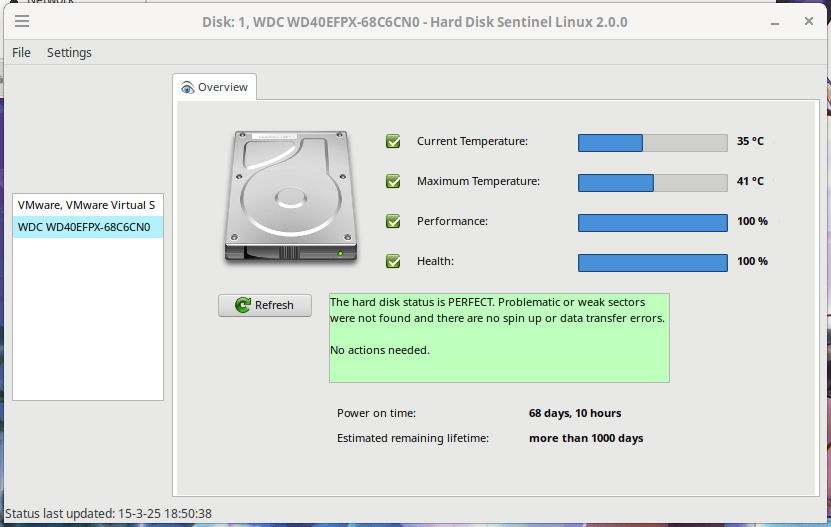
How to Run Hard Disk Sentinel on Linux
Introduction
Monitoring the health of your storage drives is crucial to preventing unexpected data loss and system failures. While Hard Disk Sentinel (HDSentinel) is widely known for its intuitive graphical interface on Windows, many users don't realize that a powerful, lightweight command-line interface (CLI) version is also available for Linux.
Running Hard Disk Sentinel on Linux allows system administrators and tech enthusiasts to quickly check the health, temperature, and performance of their HDDs and SSDs. Whether you are managing a headless Linux server or just want a quick diagnostic tool for your daily driver, HDSentinel provides deep insights that standard utility tools might miss. In this guide, we will walk you through how to download, set up, and run this utility directly from your Linux terminal.
Why Use Hard Disk Sentinel on Linux?
While Linux comes with built-in tools like smartctl (smartmontools) to check drive diagnostics, Hard Disk Sentinel simplifies the process by generating a highly readable, comprehensive report.
Here is what HDSentinel CLI can do for your Linux system:
- Detailed Health Reports: It displays a clear percentage health status for both HDDs and SSDs.
- Temperature Monitoring: Track current and maximum lifetime temperatures to prevent overheating.
- RAID Support: Unlike generic tools, HDSentinel can often read status information from drives configured in hardware RAID arrays.
- Performance Metrics: View the total power-on time and estimated remaining lifetime of your drives.
Prerequisites
Before we begin, ensure you have:
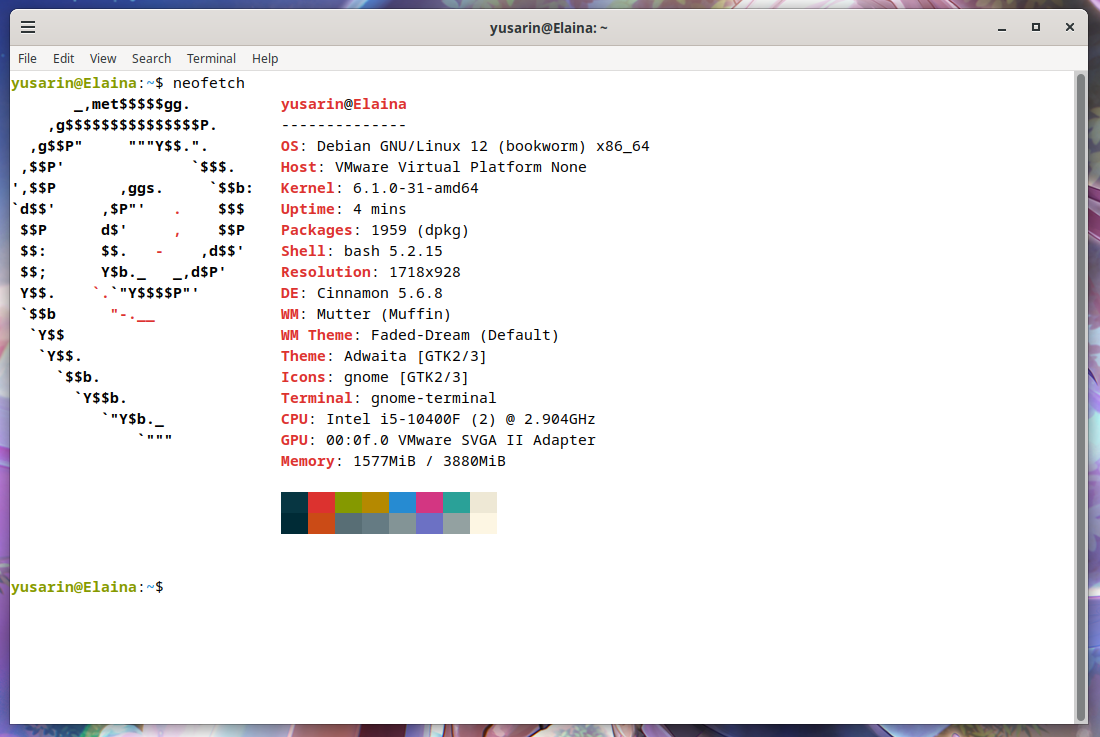
- A Linux distribution installed (Ubuntu, Debian, Fedora, CentOS, Arch, etc.). In this case, Debian 12 Cinnamon is used.
- Root or sudo privileges, as reading hardware SMART data requires administrative access.
- An active internet connection to download the utility.
Step-by-Step Tutorial: Running HDSentinel on Linux
-
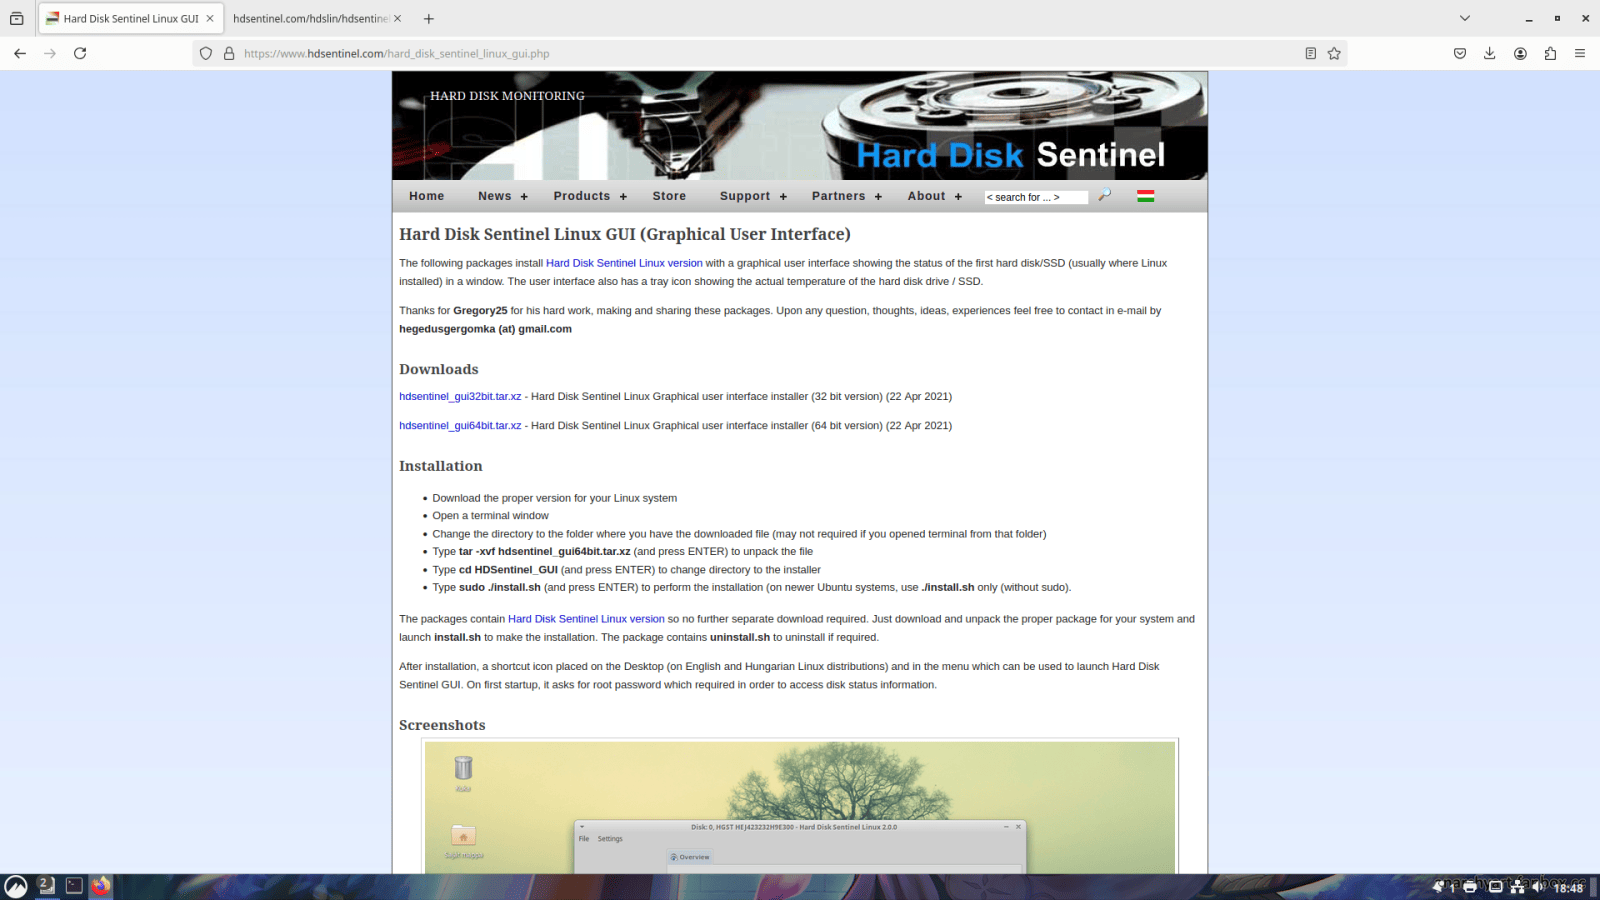
First, download the Hard Disk Sentinel package from their official website at https://www.hdsentinel.com/hard_disk_sentinel_linux_gui.php
-
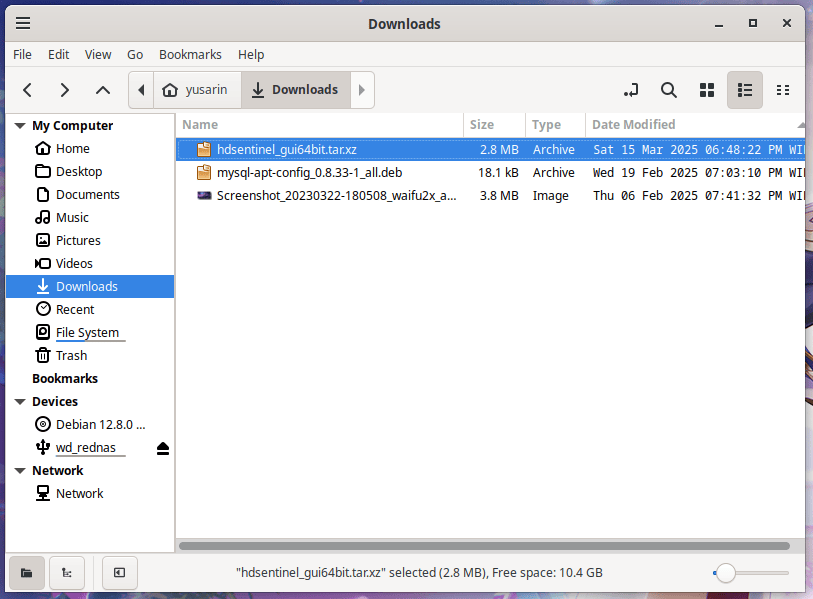
Go to the folder where the download is saved; it’s usually located in the /home/user/Downloads folder
-
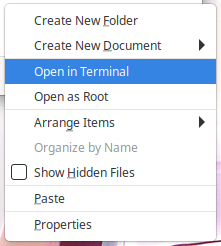
Right-click on an empty space and select “Open in Terminal”
-
Extract the compressed file by running the command
tar -xvf hdsentinel_gui64bit.tar.xz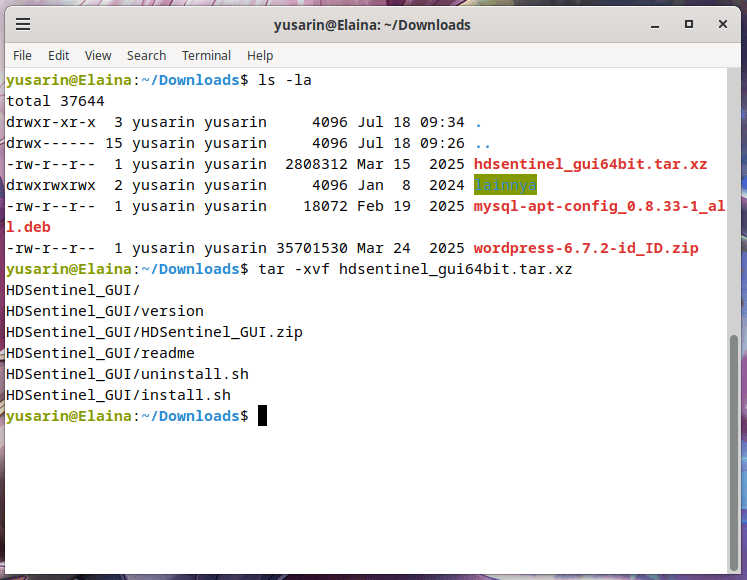
-
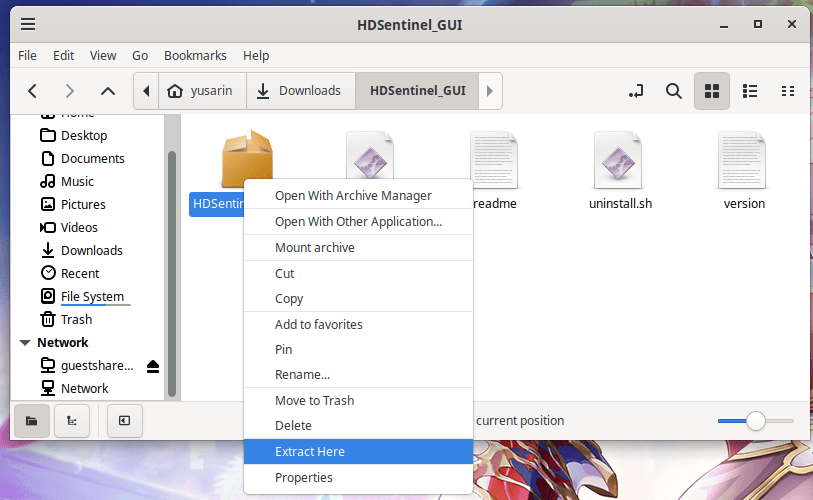
A new folder named HDSentinel_GUI will appear. Open that folder, and you’ll find a file named HDSentinel_GUI.zip. Right-click on that file and select “Extract Here”
-
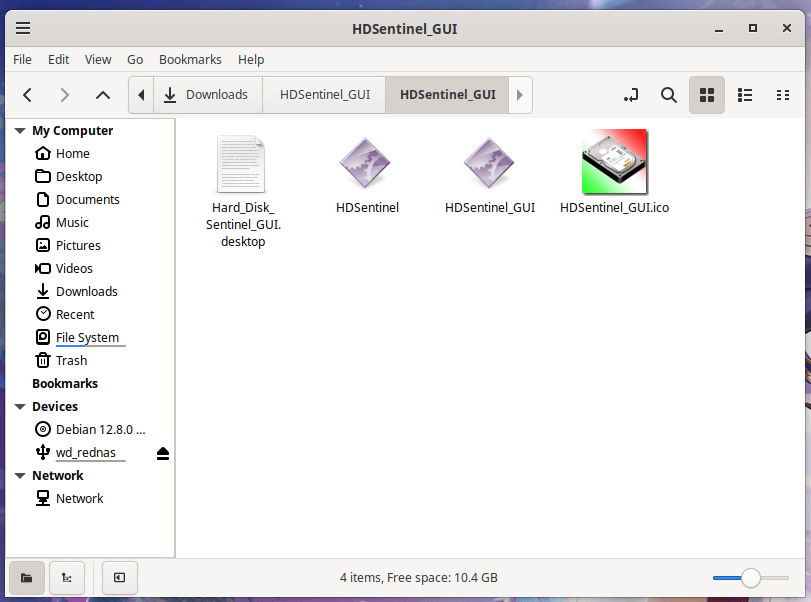
A new folder named HDSentinel_GUI will appear inside the HDSentinel_GUI folder. Open the HDSentinel_GUI folder inside the previously extracted HDSentinel folder; you’ll find several executable files, specifically HDSentinel and HDSentinel_GUI
-
In my case, I couldn’t run the executable files directly; they kept getting stuck at the password prompt, even though I had entered the correct password. So, I had to run them via the terminal as the root user by typing `./HDSentinel_GUI`. After that, I entered the password, and the application opened immediately
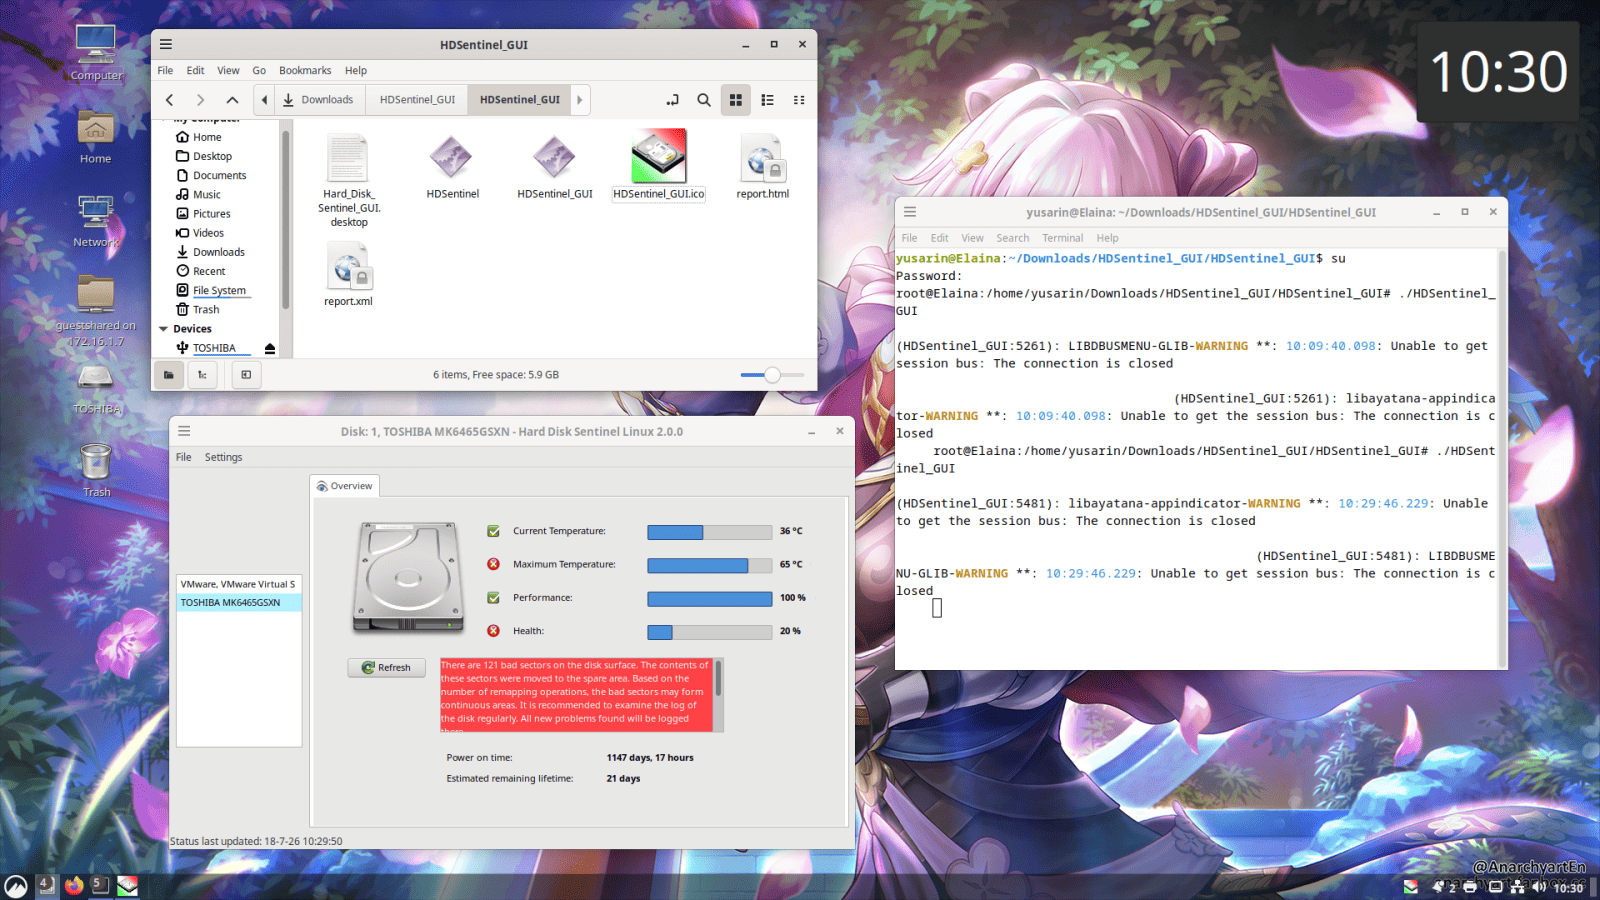
-
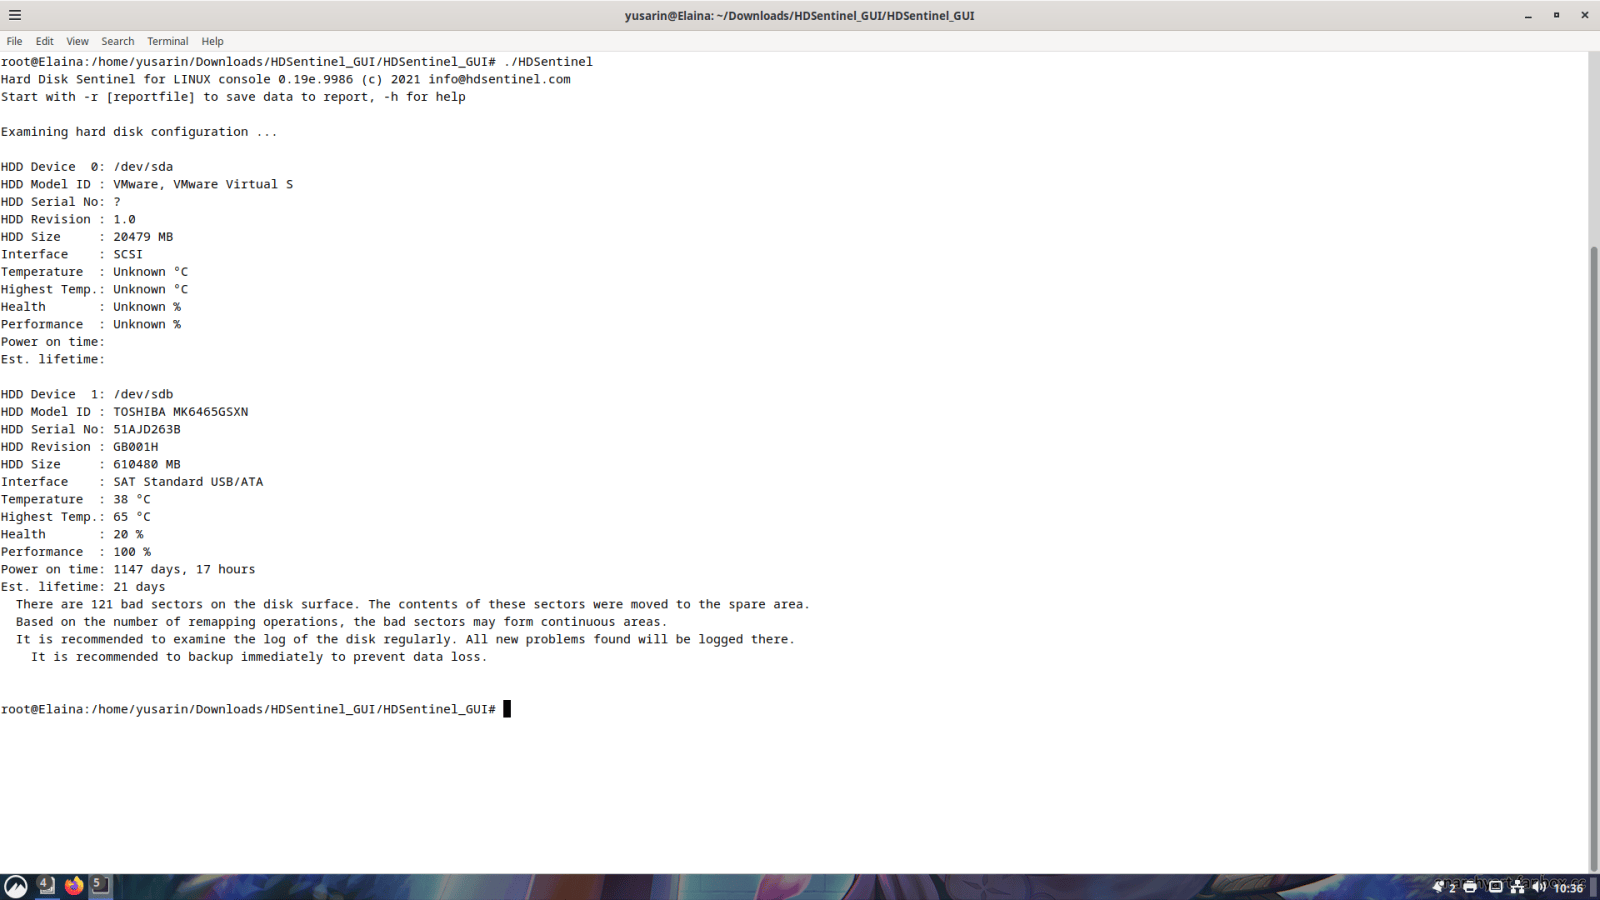
Next, we can run Hard Disk Sentinel in CLI mode. Open a terminal, navigate to the HDSentinel_GUI/HDSentinel_GUI folder, and run `./HDSentinel`.
Understanding the HDSentinel Output
Once you run the command, HDSentinel will output a detailed text report directly onto your terminal screen. You will see sections dedicated to each drive (e.g., /dev/sda, /dev/nvme0n1).
Pay close attention to the Health and Performance percentages. If the health drops below 100%, the tool will often provide a brief description of the issues found, such as bad sectors or communication errors. If you see a low health score, it is highly recommended to back up your data immediately.
Conclusion
Running Hard Disk Sentinel on Linux is a quick, efficient, and reliable way to audit your storage health without relying on heavy graphical software. By spending just a few minutes in the terminal, you can foresee potential drive failures and save yourself from the nightmare of unexpected data loss.